How to Make a Christmas Wreath Easy Homemade Wreaths
 When I lived in Minnesota, and making Christmas Wreaths during the Christmas Season was a source of income for us. A company from St. Paul contacted us and said they would pay us a dollar for each one we made.
That Christmas Season I wound up making 300 of them, so yes, I sort of consider myself an expert at making them, and I don't ever buy them anymore. We found out later they were selling them in the stores for 10 dollars each and all they added was a big red Christmas bow.
Materials you'll Need:
Wire wreath frame or heavy duty wire coat hanger
Evergreen branches - like pine, cedar, holly
Florist wire or 22-gauge wire
Wire cutters
Decorations
Let's Get Started
Make or Buy a Wreath Frame
Begin with a wire wreath frame. These are available in a variety of sizes from craft stores. Now if you can't get one, don't despair because I have made wreaths using wire coat hangers. Just cut off the hanger part of two wire hangers with some wire cutters.
Form them into circles by bending them. Hold them together to make sure they are the same size. Wrap some wire around the tops of both hangers together. Then continue wrapping wire around the hangers all the way around and back up to the top, so you will have one sturdy wreath frame with the loop already there to hang it.
Step 2: Go cut some Greenery
 Take your garden shears and walk around in the woods or yard and cut some branches off the pine trees or bushes. After you collect about 20 branches you're good to go.
Cut them all to a 6 inch length
Take them back to the house and use some garden shears to cut each individual sections of the branch so that each is about 6 inches long.
Step 3: Wire them to the Frame
After you have them all cut to length, grab three of them, and hold them together at their ends. Wrap some wire around this first group of three, then while still holding it, lay it on the wire frame and wrap the wire around the frame, pulling it snug, put not tight enough to cut the stems.
Lay your frame down on the floor, and grab three or four more stems, holding them together at the ends. Place them next to the first group you just wired, but down about a half inch lower. Start wrapping wire around this second bunch and wrap the wire around twice.
Continue the WiringGrab a bunch of three or four more clippings and place it a half inch below the second group and wrap wire around it twice. Repeat the steps, and add the second bunch onto the frame so that it's top overlaps and conceals the base of the previous bunch.
So what you are basically doing is straddling your groups of three or four clippings around the frame, wrapping each group twice with the wire. Continue this process, overlapping and moving in the same direction, until you've covered the frame with foliage and branches.
Finishing the endWhen you get towards the end, and there is just room enough for one more group of clippings, then kind of squeeze it into the first group you wrapped and wrap with wire securely three times.
On the last loop you can leave some extra wire as a hanger if you want, but I always just hung it from the frame itself. If you used coat hangers then you already have a loop.
Decorating the wreath
If you have some red ribbon or bows, attach them with a length of wire. Do the same thing for ornaments too. You can hot glue on some pine cones or candy canes too.
How to Make a Wreath without a Frame
Cut branches ranging in length from about one to two feet long. Evergreen is relatively easy to work with as it is bendable and pliable. Lay a branch down on a flat surface. Place another on top of the first so that the bottom of the second branch overlaps the top of the first.
Keep in mind that to achieve a proper and natural effect the branches should be placed so that the needles are pointing in the same direction. Attach the two branches together using twine or wire. Repeat this process, overlapping the branches until you have reached the desired length. At this point you can keep your branches straight and hang as a garland or you can connect the two ends to form a circle and thus you have made a wreath.
Repeat the process until you have achieved the desired thickness. Decorate your garland or wreath with pine cones and acorns, baby's breath and dried flowers. Add some ribbons or bows or even hang lights and ornaments.
Decorative Decoupage Bread Wreath
(Make 1 wreath, about 12 inches in diameter)
1 loaf frozen white bread dough, thawed
Let dough rise until doubled in size. Divide into thirds. Shape each into 24 inch strip on floured surface. Braid together, stretching strips while braiding to keep even and uniform in length. Place in a ring on a greased cookie sheet. Seal the ends together. Cover; let rise in a warm place until light or doubled in size, 30 to 60 minutes.
Bake at 375 for 25 to 30 minutes, or until a very nice rich golden brown. Let dry in a cool place for several days until very hard. Glue ring from a pop or juice can on the back at the seam.
Brush varnish on both sides of the wreath several times, or spray the wreath with a clear acrylic. The finished wreath should have a heavy clear sheen of varnish. When dry, place an attractive bow and sheath of grain at the top. Fasten a wire or string to the ring and hang.
Tip: A perfect braid is made by starting in the center and braiding both ways.
Shortcut wreath: Divide the dough in half and make 24 to 30 inch strips. Twist the strips together to make the wreath.
Crochet a Christmas Wreath
"Tired of the same old evergreen wreath year after year? Why not give this year's wreath a whole new look? Try crocheting any one of these fantastic decorations below.
Your front door will take on a whole new look. Add one above the mantle or on the guest room door for a quick holiday pick-me-up."
These three designs below were featured in a 1985 Woman's Day magazine.
Christmas Braided Wreath
"Hang an easy to make Braided Wreath with country charm. It offers a bright welcome to both family and friends. Designed by Ruth Jacksier."
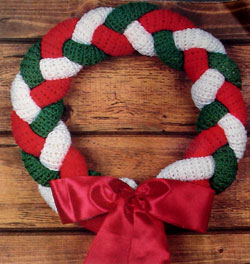
A larger Christmas Braided Wreath picture
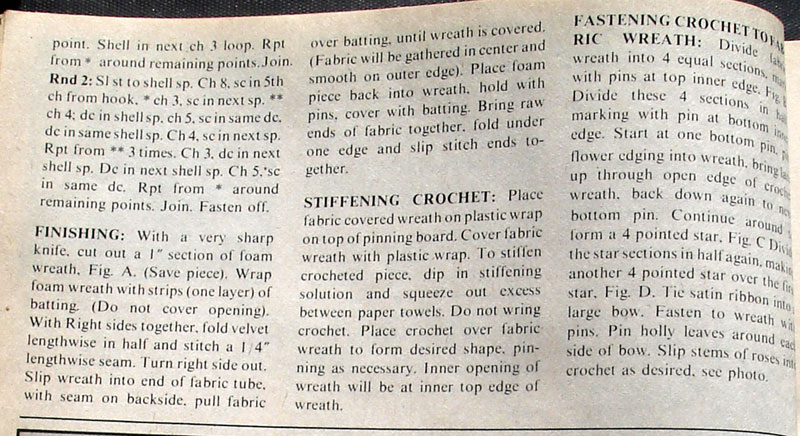
The Christmas Braided Wreath crocheting instructions
Crochet a Pineapple Wreath
Make a lacy Pineapple Wreath.
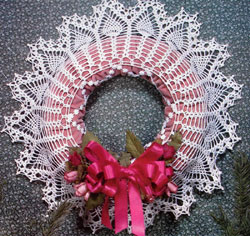
A large picture of the Pineapple Wreath
The Crocheting Instructions for the Pineapple Wreath.. page 2 instructions
A Mistletoe Wreath to Crochet
"Make a festive wreath in less than an hour! You'll never believe how quick you can crochet this Mistletoe Wreath until you try it. This is another design by Ruth Jacksier."
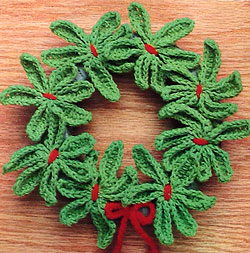
A larger Mistletoe Wreath picture
The Mistletoe Wreath crocheting instructions
Also see the Make your own Pinecone Wreaths
More Fun Christmas Stuff
How to Make a Pinecone Holly Wreath
How to Make a Christmas Bow
Start your own Christmas Traditions
Make a Christmas Costume
Crochet Christmas Ornaments
Make Felt Ornaments
Make a Christmas Wreath
Easy Oraments for Kids to Make
Christmas Tradition
Magazines for Toddlers