Build a Vertical Wind Turbine
How we built our test turbine
 When we started reading the news about an upcoming recession, we started thinking about how we could build a wind turbine to generate our own electricity.
Of course we didn't even know they were called wind turbines till we did research on windmills, then eventually realized that they are calling them "wind turbines" There are a lot of videos on uTube of people that made their own wind turbine.
We like the looks of the "vertical wind turbine." It just seems to look cooler and more efficient. For one thing, on a regular windmill type, we just don't like the idea of the vanes ripping off, flying through the air, and smacking someone on the head.
Anyway after coming up with an idea, we went to the hardware store and bought the following items for our test turbine.
Wind Turbine Hardware List
Deep Cycle Marine Battery... $71.00
1/2" - 3ft Weldabl Rnd... $4.97
1/2" - 3ft Weldabl Rnd... $4.97
1/2" - (15/32) MIN 3.95... $4.67
2" 3"x4' width treated wood... $.29
3/16"x 1 - 14" 3ft WLDA... $7.68
1/8"x 1" 6ft Weldabl... $8.67
4"x 5' PVC pipe ASTM... $7.99
SS 1/4 Hex nut (17pc)... $1.79
1/4 Lockwashers (30pc)... $.49
1/4x3/4 Bolt GRD8 3... $1.99
SS Flat Washers (2)... $1.39
1500 amp Inverter... $225.96
(2) Idler 5/8 ball bearings.... $5.39
---------------------------------
total............................ $
Building the Turbine
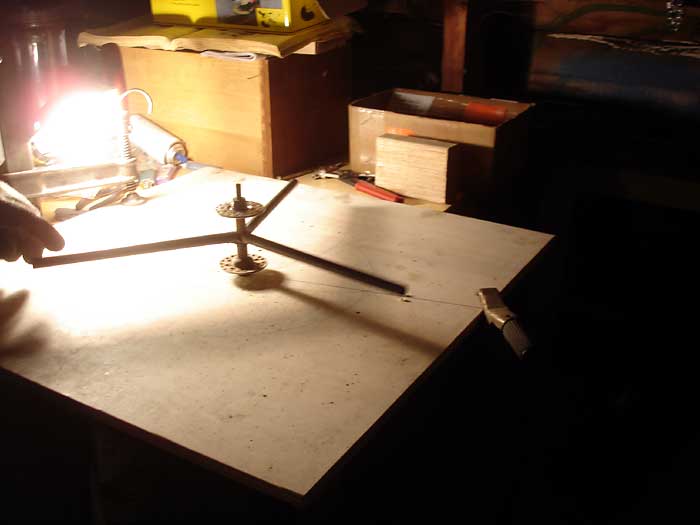
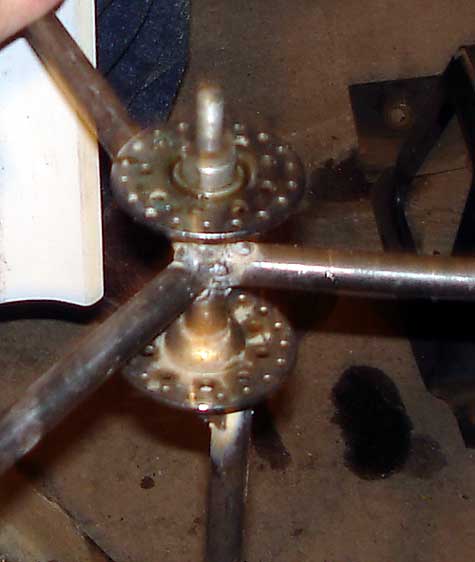
We decided to build our test turbine using the front bearing from a bicycle wheel. It has 2 bearings in it, and a small rod between them.
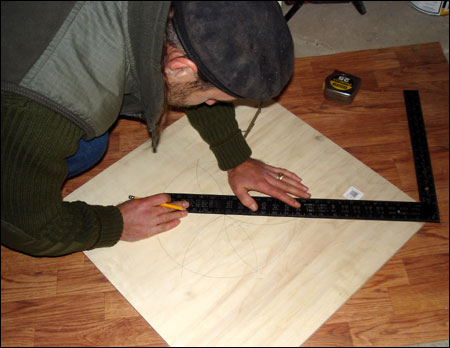
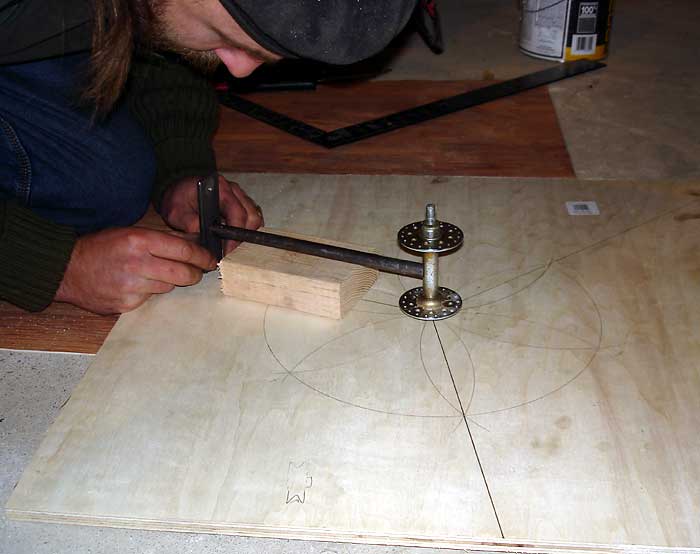
The first thing we did was draw out a template on a piece of plywood using a compass. Drew a circle, then drew 3 angles intersecting the exact distance from each other. Then used a square to draw lines from them.
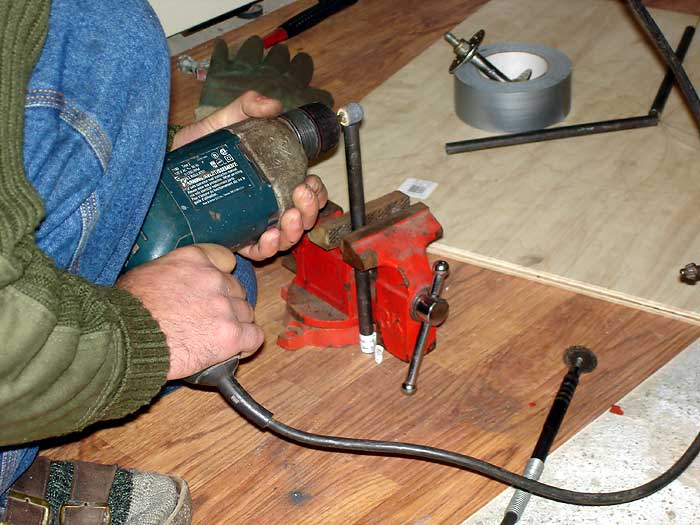
Then we cut a hollow bar into 9 inch pieces using a dremel. (We got hollow bars thinking that they would be stronger than a solid bar.)
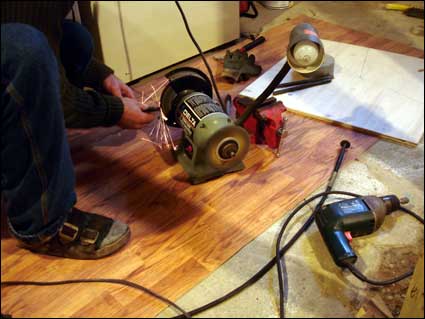
Then using a bench grinder he put a curve in one end of the bars so it would be snug around the bicycle wheel bearing when he welds it. That didn't work too well, so then he used a bench grinder.
Then he cut 3 plates out of the flat rod, 1 1/4x4", then measured 1/2 in from each end for the bolts, and in the center (where the rod will be welded) then punched a spot where he could drill the hole easier.
He drilled a center hole in the plywood, put the bicycle bearing on it and set the bars and plates around it to see what it would look like.
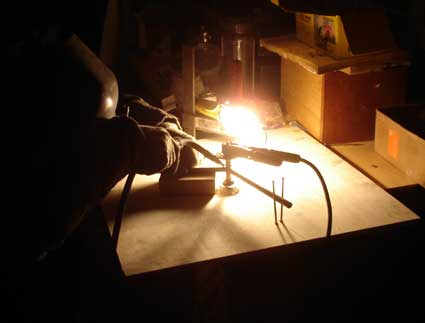
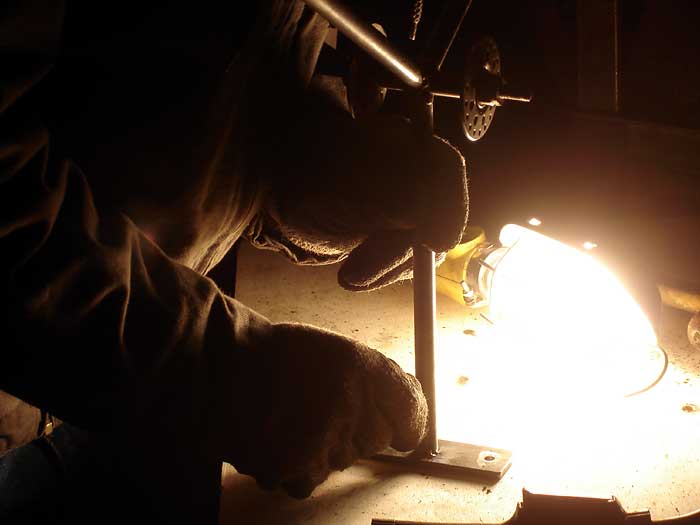
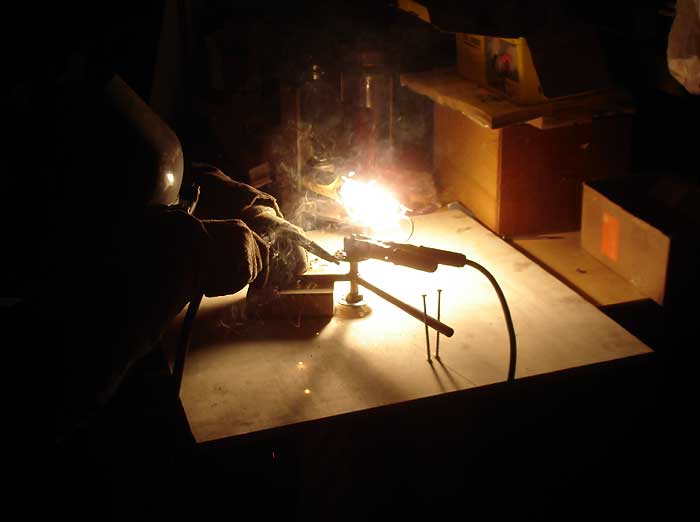
We then went out to the garage, fired up the arc welder, and welded the bars and then welded the end plates. 1 rod welded... 2 rods welded... 3 rods welded
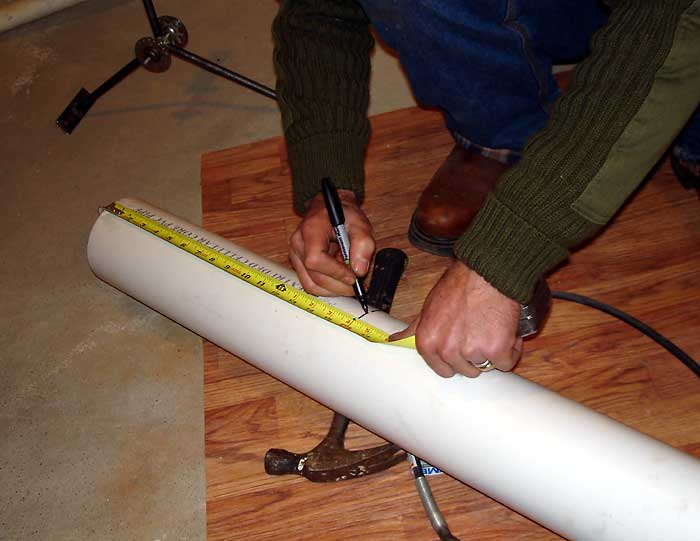
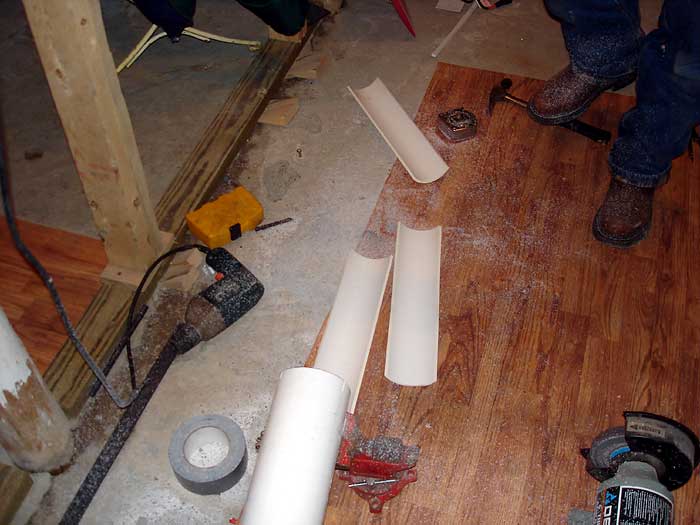
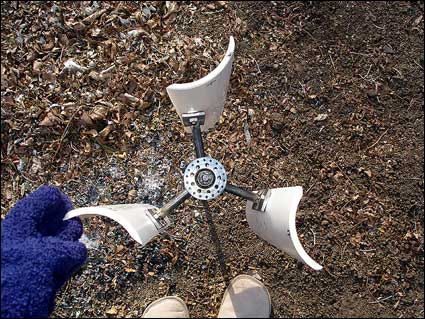
Now to cutting the blades out of the 5 ft PVC pipe. We decided to make the blades 16 inches. Then we had to figure out how to cut the pipe into 3 equal pieces. Using a soft ruler, we marked off 4 1/2" spots, which was close, but not perfect.
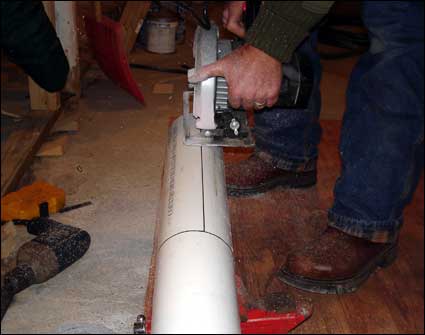
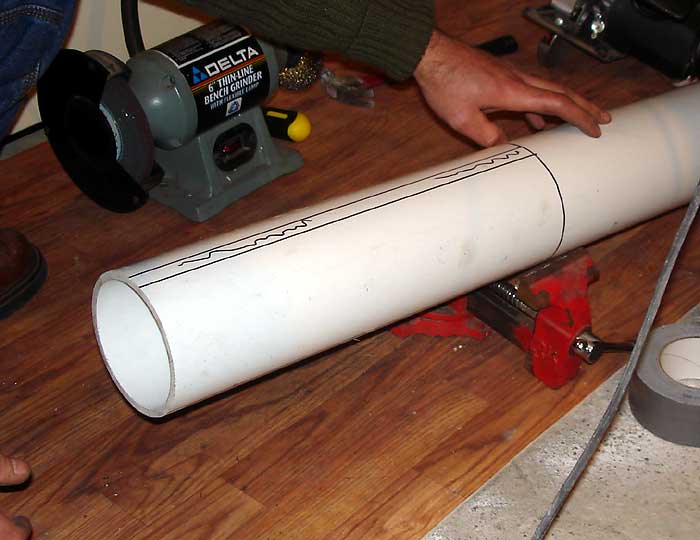
It was easy to cut the PVC pipe using our Skillsaw, we cut the 3 pieces, then he used the bench grinder to smooth the edges. He divided each blade in half, measured and marked where the plates will attach.
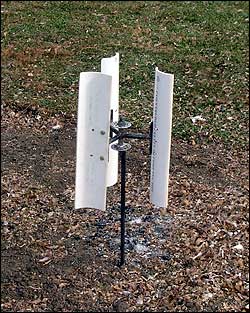
We went back out to the garage and used the belt sander to take to edge off the inside edges, and also welded a metal pole to the bottom of the bicycle bearing, then using the bolts, we attached the PVC blades, took it outside, and stuck it in the ground, and it wouldn't spin. He took it back in the garage, shortened the arm rods, rewelded, and then took it outside, and it STILL WOULDN'T SPIN!
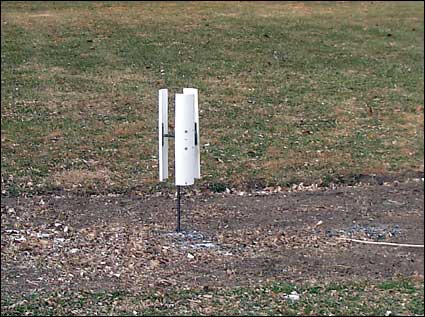
Then we had to figure out why it wouldn't spin. We took the turbine back in the garage, and drilled holes at the edge of the blades instead of the center, took it back out, and it still wouldn't turn, (and this was on a day that we had a wind advisory too!)
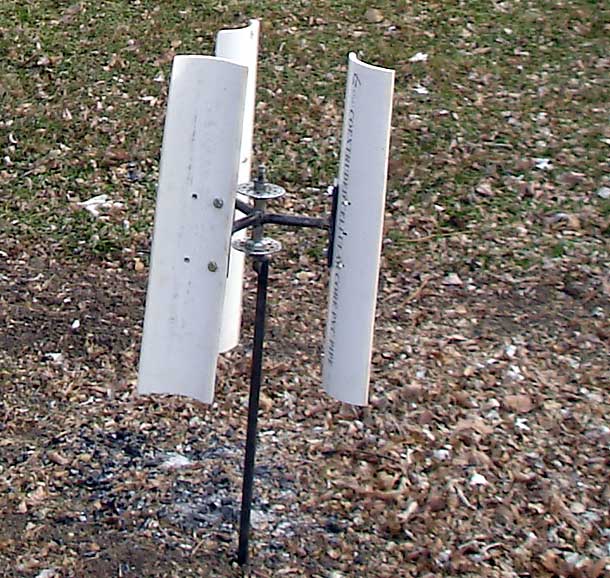
As we stood there and watched it do nothing. We sadly admitted to ourselves that we know nothing about aerodynamics. Then I suggested he flip the blades around so that they curve outward. And lo and behold it started spinning!
It has been spinning ever since, and now that we know that we can make one, we're ready to build a real one!